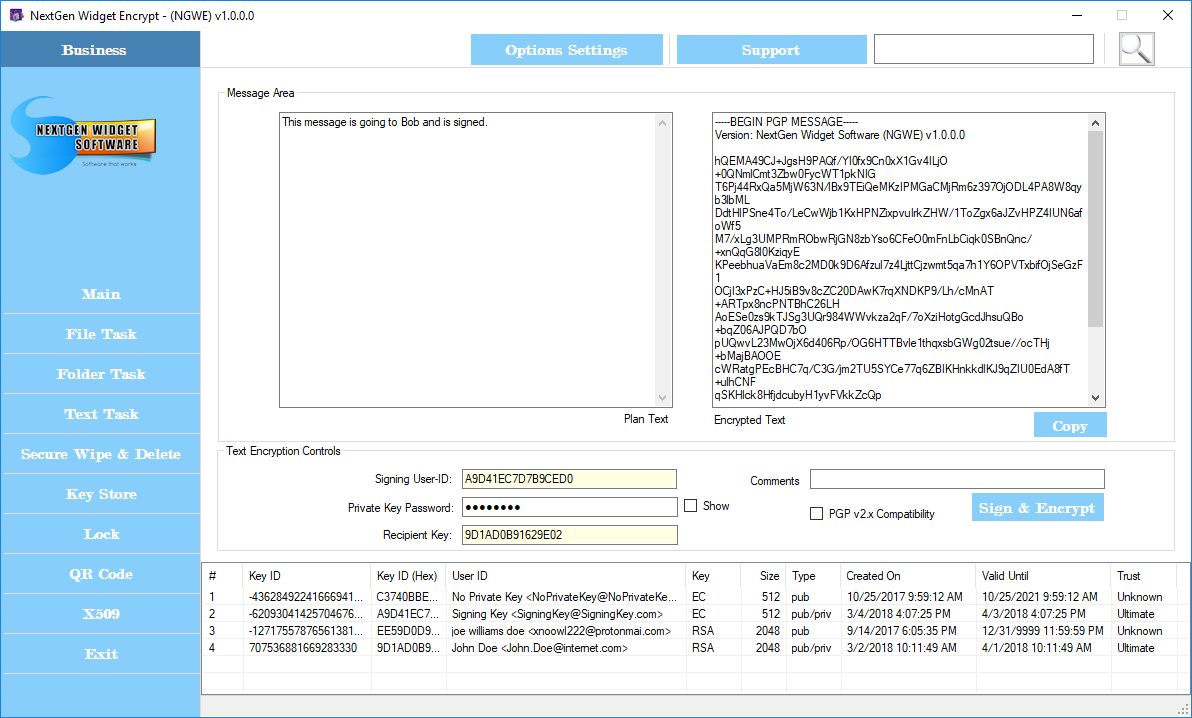
Sign & Encrypt Text
Many times you may need to prove to the sender that you are who you say you are. This is done by signing the key and it is verified on the other end with your public key. In this case we will create a message, the User ID that will sign the message, enter the private key password and select the recipients public key.
For this example I have generated another key called "Signing Key" so that I have another public and private key located in the Key Store. The "Signing Key" is going to be the creator of the email or message and the recipient is going to be "John Doe". First I'm going to select the User ID "Signing Key" and a confirmation window pops up asking you if you would like to select the signing User ID. The reason for this is because the same pop up is used to answer the recipients User ID as well.
Some of the old versions of OpenPGP are not really compatible with the newer versions. However, if you have someone that's using an older version of OpenPGP v2.x. Just clect "PGP v2x Compatiblity".
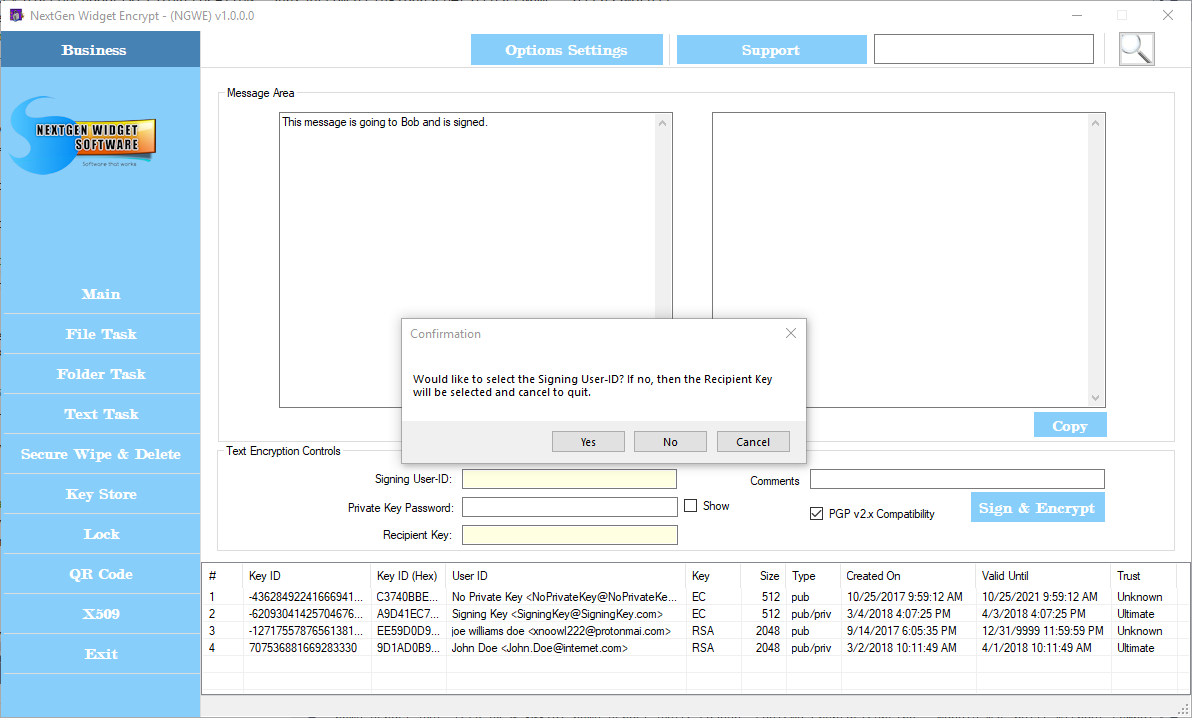
Since I'm looking to enter the signing User ID I'm going to select yes and then enter the password. Next, I repeat the same process but this time selecting "No" and the program adds the User ID to the recipient field. Now the only thing left to do if I don't want to add a comment is click the "Sign & Encrypt" button.